
Sunday, July 31, 2016
Banana Erasers
I love office supplies like pens, pencils, erasers, things like that and anything in a cute shape or a unique look to it really catches my attention. These erasers were adorable and I couldn't pass them up. They were only $1.85 (CAN) when I bought them and the shipping was free. They took a little while to come in but when they finally arrived they were in good condition.

Wednesday, July 27, 2016
Tuesday, June 14, 2016
Colour Change
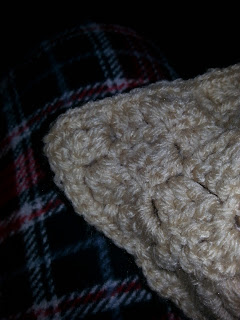
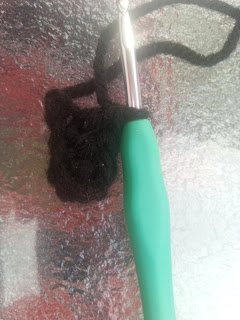
As I go through these posts I realize I never made a blog about how to do a colour change when crocheting. The way I do a colour change is very simple, and I won't post too many pictures but I will post a link to the youtube video I watched when learning what to do (Video Here).
The thing to remember when doing a colour change is to never finish your stitch. No matter what stitch you do you want to remember to never finish it. In the case of a single crochet stitch you would go threw your stitch, yarn over pull through and stop there before finishing the stitch. In the case of a double you would yarn over, go through the stitch, pull through the first two stitches on your hook and stop there.

The thing to remember when doing a colour change is to never finish your stitch. No matter what stitch you do you want to remember to never finish it. In the case of a single crochet stitch you would go threw your stitch, yarn over pull through and stop there before finishing the stitch. In the case of a double you would yarn over, go through the stitch, pull through the first two stitches on your hook and stop there.

This is where you would do the colour change.
To do the colour change you want to leave a long tail on the second colour, make a loop (not a knot) and then pull it through the two stitches. Pull everything tight and continue on working.
K and Company Classic Wedding Scrapbook Kit (12 x 12)
As I said in a previous post scrapbooks can get expensive. At Michael's the cheapest you can find would be $30.00 dollars give or take unless there is a really good sale or you have a coupon. I one was gifted a scrapbook that cost close to $50.00 so they can get really expensive. The paper can get expensive also, even at a "variety store" they cost at least $1.50 each with the books being around $20.00 and stickers anywhere from $2.00 - $5.00. So this kit for around $33.25 is a good deal. It comes with the book, 12 pages, and four pages of stickers. And they are all very beautiful.
 |
| Wedding Scrapbook Kit |
Saturday, June 11, 2016
3 Different Pillow Case (C2C)
Once you learn how to C2C crochet, it is very easy to quickly make up blankets and other things. Before trying a Corner to Corner blanket I decided to start small and make pillow cases. In this post I am going to show you how to make three different pillow cases.
First Pillow Case:
To start I went with simple. I picked one colour that I liked that matched the living room furniture. You can choose whatever colour you want.

 When making a pillow you have to remember you need two panels (one for each side). Once you have the two panels you need to put them together. The way you do this is up to you. You can either put them together the way you would sew granny squares together around three sides or you can finish them off with an edge. Whatever you do, make sure you leave one section open!
First Pillow Case:
To start I went with simple. I picked one colour that I liked that matched the living room furniture. You can choose whatever colour you want.

This is Red Heart Super Saver and the colour is called Buff. This square is 23 x 23, because that is what fit my pillow. It is always a great idea to measure what size you need and make your panels accordingly. If you don't have a specific pillow in mind and still want to crochet this I recommend at least a 20 x 20 square.


I finished mine off with a little edge of single crochet and I left the edge facing outside, you can always turn it inside out and then sew in the final side.
Second Pillow Case:
For this next one I decided to try a simple pattern. You can design these yourself by making a square the size you're making (for this one I did 20 x 20) and then adding in whatever pattern you want. I decided just to do a simple pattern with diagonal lines. (Here is a great youtube video on how to do a C2C colour change)
THIS POST WILL BE EDITED WHEN THE OTHER PROJECTS ARE FINISHED!
THIS POST WILL BE EDITED WHEN THE OTHER PROJECTS ARE FINISHED!
Natural Homemade Lip Balm (Book)
This is another book I got free. I had it on my wish list and check back in and it was free one day so I got it and added it to my kindle! I recommend doing this for books you'd like to see or read but don't want to pay too much for it. I do this with Homemade things mostly because I want to try making stuff but not sure if I will like it or ever get around too it since some can be expensive.
 |
| Natural Homemade Lip Balms |
Antique Bronze Cable Link Chains (12 pcs)
These chains were another cheap thing to help finish off a pre-paid credit card I had. For $1.98 9 (CAN) there are 12 chains and you can add whatever you want to them to make them a necklace. They are very light but it feels like they can put up with everyday life and not break too easily. Mine shipped for free, now they ship for $3.99 (CAN) but I would say it is worth it. (They are also available in silver.)
 |
| Bronze Cable Link Chains |
Monday, June 6, 2016
Jewelry Beads
These beads I ordered together so I will just make one post for them. I bought them with the same purpose in mind to try making my own jewelry. I loved doing it as a kid with just the simple kits they offer children. So I figured why not try it as an adult too. These beads look very beautiful and they were cheap for a string of them. First I ordered Silver Plated Stardust Sparkle Round Beads (50) they were only $1.70 (CAN) when I bought them plus free shipping, they still ship for free but are $1.82 (CAN) now. Then I ordered these Pink Lampwork Glass Beads (10) for $2.69 (CAN) plus free shipping. They may seem expensive but they are very beautiful and for glass beads they aren't that bad.


Tuesday, May 24, 2016
Simple Stories Wedding Stickers
As I posted before, for a few weddings I have this year I am making scrapbooks for the couple. For this I am ordering a lot of stuff online (and not just from Amazon). One of these things is stickers. Lots and lots of stickers. I picked these because they have the letters in them and some nice themed stickers for weddings. I paid $9.87 CAN and it shipped for free at this moment they are $6.48 CAN and $3.99 shipping so a little more expensive but not too much.


Wednesday, May 18, 2016
Coloring Books For Adults: Volume 2
This is another great find. I have one of the other books from this series and I got it for free also. This one I put on my list when it was around $5.00 CAN and just waited for it to come up for FREE on my wish list. They are nice little pages (40 of them in this one). You get the kindle book in this download. Originally the intent was if you like the pages you can pay for the download I believe but in this case it gives you a link to a PDF file at the end of the book that you can print off.


Grass Blade Leaf Pen
I love pens and just all around office supplies. And anything quirky gets my attention and I just have to have them! So when I saw these pens I fell in love with them. Granted they look like beans or some other vegetable but in a bunch they are cute and they have other types of pens that would go well with them also (Bamboo).
 |
| Grass Blade Leaf Pens |
Wednesday, May 4, 2016
Scrapbook Items
To highlight my sticker addiction I also bought Me and My big ideas Our Wedding Sticker Flip book. It has five pages of stickers and they are all wedding themed, including one pages of glitter letters. And I also bought Me and My big ideas Black and White Wedding Sticker Flip Book.


As I have said before I always buy with pre-paid MasterCards or Visa when buying online so to finish off the card I bought for these things I also added Trends International Alphabet Slim Stickers.

Wednesday, April 27, 2016
Soap Making
One of the great things about Amazon is that you can find a lot of kindle books for cheap. I was very excited to find two more Soapmaking books for $0.01 (CAN) on amazon and I ordered them right away. I always pay my amazon orders with prepaid VISA (or MasterCard) so there is always a few cents left on the cards. These books are a great way to use up some of the left overs.


Beads (For Jewelry Making)
Finally, for now, I bought some nice beads for making jewelry. They were both less than $2 (CAN) so the price was right. The Souarts Mixed Pattern Printed Wooden Beads cost $1.98 plus $3.99 shipping but you get 100 pcs. They look beautiful and that's why I bought them. The Silver Plated Stardust Beads I bought were $1.70 (CAN) and shipped for free and they look stunning also. I think as long as you buy what you like in beads you'll never go wrong and it's always nice to have variety.


Ultimate Guide to Soap Making
As you can probably tell Amazon is really good for cheap book downloads. I also found a book called the Ultimate Guide To Soap Making by Amanda McCarthy. Again adding to my dreams to make beauty products I jumped on this book. It is a free download on Kindle Unlimited or $1.05 on regular Kindle.

This is a great starting book to see if you like soap making and it's a good starting book for cheap too.
Coloring Books For Adults: Vol 1
Next, I found a beautiful colouring book called Coloring Books For Adults Vol.1: 40 Stress Relieving and Relaxing Patterns. It is a free Kindle Unlimited download and only a $2.99 (CAN) download for the regular Kindle version or $7.77 for the Paperback version. I really recommend the Kindle version. You download the book and you can see all the patterns. You CAN NOT colour it in the Kindle App and CAN NOT print it from the app either but there is a link at the end of the book that you can print.

Smart Lotionmaking and Other Books
The next three things I got from Amazon, were about finding good deals. I bought a set of 3 romance novels called Romancing the Dead for free (Kindle Download). I also downloaded for free How to Write a Book From Outline to Finish Line, great way to help your writing skills. Finally for $0.01 (CAN), I got Smart Lotionmaking, I have never made lotions or any beauty products but I have always wanted to and for a penny, you can't go wrong with buying this digital book (Kindle version).


Elastic Cord
After Adult Colouring Books inspired me to find my creative side again, I started looking into other art projects and craft projects I would enjoy doing. And I found like colouring, jewelry making can be an adult thing also. I wasn't sure at first if I would like it and how much money I actually wanted to spend on it so I started off small. I got 10 rolls (mixed colours) of Elastic Cord Strong Stretchy Beading Thread String for $0.29 (CAN).

This was a great deal, I paid more in shipping than what I paid for the thread but it was worth it. Even if you don't use it for jewelry, you can find many uses for it and it was a good price. At this time it sells for $4.91 plus free shipping so that comes out to a few cents more expensive than what I paid but still worth it.
Wednesday, April 6, 2016
Adding a Single Crochet Border
For some patterns in crochet, you will see them call for a border. This can be a simple border or a more decorative one, either way a border is a good way to finish off a project. I started crocheting a simple blanket for a friend's birthday. Just a plain old half double crochet blanket, no graph, no pattern just straight crocheting. Now that I finished the blanket, I want to add a simple border to give it a nice finishing touch. Since I have never done a border I used this video, to help me.
To start with I crocheted a simple Half Double Crochet Blanket with a starting chain of 150. I didn't count how many rows I did, I just know I ordered seven balls and used them all. I found this was a nice size, you may want it bigger or smaller depending on what you are making.
After finishing the blanket, just to add a little something and make it look more complete, I added a Single Crochet Border. A border like that is very easy to do, you want to start exactly where you finished (on your working side) and simply add another row to your project, in this case of single crochets. Once you finish the row and hit the corner you want to add three (3) single crochets to make the turn.


To start with I crocheted a simple Half Double Crochet Blanket with a starting chain of 150. I didn't count how many rows I did, I just know I ordered seven balls and used them all. I found this was a nice size, you may want it bigger or smaller depending on what you are making.
 |
| Completed Half Double Crochet Blanket |

Once you start crocheting up the side you have to remember your stitch. With this blanket, because I used the Half Double Crochet stitch, each row counts as two, so you will have to do two single crochets per row (this also applies for a Double Crochet blanket with a single crochet border). Again, once you come to the corner you want to add three single crochets to the same corner stitch. Next you will be doing the starting chain, this will be slightly odd because it won't look like a normal stitch (like at the top), this will be what was left of the chain stitch after you stitched into it. (Simply single stitch like you normally would.) After that you will get to the corner again and go back up the final side.

To finish the border off, you get back to the corner you started at. There is already one stitch here (your starting stitch), so you add only two (2) this time. Now you find that first stitch and make a slip stitch to finish everything off nicely. Once I cut the yarn and pulled it through the final stitch, I sewed in the starting and finishing tails.
Wednesday, March 23, 2016
Knitting Abbreviations
Same with the Crochet Abbreviation, I was cleaning up my bookmarks on my browser and found this page I saved for later!
This list is from WillowYarn and I will add anything else to it if needed.
approx - Approximately
beg - Begin/Beginning
bo - Bind Off
cc - Contrasting Color
cdd -- sl 1, k2tog.psso
cm - Centimeter
cn - Cable Needle
co - Cast On
cont - Continue
dec - Decreases
dpn - Double Pointed Needles
inc - Increase
k - Knit
k2tog - Knit 2 stitches together
k3tog - Knit 3 stitches together
kfb - Knit in the Front and Back of the next Stitch
k-wise - Knitwise
m - Marker
m1 - Make 1
m1l - Make 1 Left
m1r - Make 1 Right
m1p - Make 1 Purl
mc - Main Color
p - Purl
pat - Pattern
pm - Place Marker
psso - Pass Slipped Stitch Over
p-wise - Purlwise
rem - Remain
rep - Repeat
rnd - Round(s)
rs - Right Side
s2kp - Slip 2 together, Knit 1, Pass Slipped Stitches over Knit Stitch
sk - Skip
skp - Slip, Knit, Pass Slipped Stitch Over
sk2p - Slip 1, Knit 2 Together, Pass Slip Stitch Over the Knit 2 Together
sl - Slip
slm - Slip Marker
ssk - Slip, Slip, Knit these 2 Stitches Together
st st - Stockinette Stitch
st - Stitch
tog - together
w&t - Wrap and Turn
ws - Wrong Side
wyib - With Yarn in Back
wyif - With Yarn in Front
yfwd - Yarn Forward
yo - Yarn Over
Crochet Abbreviations
Anyone who knows me know I keep everything! And the same goes with bookmarks on an internet browser. I save it for later and never get around to looking at it! So now as I try to clean up my browser I found 3 (yes three) different posts about Crochet Abbreviations that I saved a long time ago. Hopefully, this helps anyone struggling with the terms and reading patterns and it will help in my clean up process!
I am going to start with the blog I read at Mooglyblog.com and then add to the list as I go.
alt - Alternative/Alternate
beg - Begin/Beginning
bet - Between
blo - Back Loop Only
bp - Back Post
bpdc - Back Post Double Crochet
bpsc - Back Post Single Crochet
bptc - Back Post Treble Crochet
CA - Color A
CC - Contrasting Color
ch sp(s) - Chain Space(s)
cl - Cluster
cm - Centimeter
cont - Continue
csdc - Chainless Starting Double Crochet
dec - Decrease
inv dec - Invisible Decrease
dtr - Double Treble
edc - Extended Double Crochet
ehdc - Extended Half Double Crochet
esc - Extended Single Crochet
fdc - Foundation Double Crochet
fhdc - Foundation Half Double Crochet
flo - Front Loop Only
FO - Finish Object or Finish Off
fsc - Foundation Single Crochet
fp - Front Post
fpdc - Front Post Double Crochet
fpsc - Front Post Single Crochet
fptr - Front Post Treble Crochet
hbdc - Herringbone Double Crochet
HOTH - Hot Off The Hook
inc - Increase
ldc - Linked Double Crochet
lp(s) - Loops
ltr - Linked Treble Crochet
MC - Main Color
MC/ MR - Magic Circle/ Magic Ring
p - Picot
pm - Place Marker
prev - Previous
quadtr - Quadruple Treble
rem - Remaining
rep - Repeat
rnd - Round
RS - Right Side
rsc - Reverse Single crochet (Crab Sitich)
sk - Skip
sl st(s) - Slip Stitch(es)
sp(s) - Space(s)
st(s) - Stitch(es)
tbl - Through Back Loop
tch - Turning Chain
tog - Together
tr - Treble
trtr - Triple Treble
UFO - UnFinished Object
WIP - Work In Progress
WS - Wrong Side
yo - Yarn Over
Different Types of Stitches:
CH - Chain
SC - Single Crochet
DC - Double Crochet
HDC - Half Double Crochet
V ST - V Stitch
Blanket Stitch
Tuesday, January 19, 2016
Corner To Corner Crochet (C2C)
Corner to corner crochet (called C2C) is a simple way to crochet once you get the hang of it. All you need to know is how to chain, how to make double crochets and how to slip stitch. You will notice that C2C crocheting has more holes in a project but it looks very beautiful.
Step one:
To start any C2C project you need to start with a chain of 6 stitches. (A How To Post on that is available here). Below is what a chain of 6 looks like.


To start the decrease, you need to flip your work. You will notice the box you just finished has three stitches. You want to skip the first and then do a slip stitch into the other two stitches. Now you will be back where the chain started the last box. You want to slip stitch into that gap, and then continue like it was a normal box, chaining three and then placing three double crochets into the gap you just slipped stitched into.

The process of increasing and decreasing is very similar. To increase, chain six to create the next box, to decrease you slip stitch. Then the process is the same. Below is what the finished product should look like.

Step one:
To start any C2C project you need to start with a chain of 6 stitches. (A How To Post on that is available here). Below is what a chain of 6 looks like.

Step two:
To start the "box" you need to work a double crochet into the fourth stitch from the hook (or third from the beginning). Make a double crochet in the next two stitches so that the row is finished.

This is what the first box looks like.
Step three:
To start a new row of boxes, chain another six and repeat the process of double crochets into the three lowest stitches. Now you should have two boxes. To attach them together, turn your work so that the boxes look like the picture below.

To attach the boxes, place your hook between the chain and the double crochets of the bottom box and slip stitch.
Step four:
Each row needs an added box to continue growing. To do this chain three and in the same space you slip stitched, and place three double crochets. With this row only having two boxes this is the end of the row. To create the next row again you need to chain and follow the same steps until the end of the row. Continue this until the size of the box has been met.

Corner to corner projects will always be a perfect square. (Keep this in mind when deciding on the size of a pattern - example I use 20 x 20 to make pillow coverings. The best way to measure is by placing the first half against what you want to cover.)
Finishing the Project:
Once you have the size you want, you need to create the other half of the C2C. You do this in a decrease this time, each row losing a box.


The process of increasing and decreasing is very similar. To increase, chain six to create the next box, to decrease you slip stitch. Then the process is the same. Below is what the finished product should look like.

This is a 23 x 23 square. I am using it for a pillow covering, for a blanket you have two options you can make multiple squares and sew them together or make just one large panel.
Subscribe to:
Posts (Atom)